.png.avif)
How do you clean generator fuel injectors
- By BISON
Table of Contents
A generator relies on a precise mixture of fuel and air to produce reliable power, and fuel injectors are at the heart of that process.
Fuel injectors precisely atomize fuel, delivering it into the combustion chamber. This fine spray is essential for smooth engine operation, consistent power output, and optimal fuel efficiency. Over time, injectors can suffer from carbon buildup, varnish, dirt, and poor fuel quality. These issues can cause hard starting, rough running, reduced power, and long-term engine damage if left unchecked.
Cleaning the injectors restores the proper spray pattern, improves combustion, and ensures the generator continues to operate smoothly. In this article, BISON will guide you through three effective ways to clean generator injectors, so you can restore performance and keep your generator running at its best.
Knowing how to clean injectors prevents costly repairs and protects your generator from long-term damage.

Understanding generator injectors
Fuel injectors are small but essential components in a generator engine that ensure smooth and efficient operation. Their main job is to deliver precisely measured fuel into the combustion chamber in a finely atomized spray. The fuel droplets need to be small enough to mix easily with air and ignite effectively.
Generators use different types of injectors depending on engine design. Diesel generators often rely on mechanical injectors, which use high pressure and precise timing to deliver fuel. Modern diesel generators may use electronic injectors, controlled by the engine’s computer system for more accurate delivery and improved efficiency.
Injectors accumulate dirt for several reasons, the most common being fuel contamination. Even clean fuel contains microscopic impurities, dust, water droplets, and chemical residues. As fuel heats inside the engine, varnish and gum form along the injector walls. Diesel fuel, in particular, oxidizes quickly, leaving sticky deposits on injector tips. Over time, these deposits restrict the nozzle, alter the spray pattern, and reduce fuel flow.
When injectors are clogged, the engine struggles to maintain stable combustion. Instead of a smooth mist, injectors release uneven droplets that burn irregularly, causing vibration, misfires, and incomplete combustion. The generator may emit smoke from excess fuel burning incompletely. Dirty injectors also raise engine temperature and force the generator to work harder to maintain power output.
Signs that injectors need cleaning
Clogged injectors often cause noticeable performance issues. Recognizing these signs early can help generator owners prevent costly repairs and maintain reliable operation.
- Rough engine performance: One of the first indicators is rough engine performance. You may notice rough idling, misfiring, uneven operation, loss of power, engine hesitation, or surging under load. These issues occur because restricted or uneven fuel flow prevents smooth combustion.
- Difficulty starting: Difficulty starting is another common symptom. When injectors are clogged, fuel enters the combustion chamber in larger droplets that resist ignition, causing the generator to shake, stall, or require multiple attempts to start.
- Inability to maintain power under load: Generators that cannot maintain power under heavy load may have restricted fuel flow. The engine may hesitate, RPMs may drop, or it may shut off under high demand because the clogged injectors cannot supply the extra fuel needed.
- Excessive exhaust smoke or fuel odor: Excessive exhaust smoke or a strong fuel odor can also indicate injector problems. White smoke signals unburned fuel due to poor atomization, while black smoke points to incomplete combustion from excess fuel. Both suggest the injectors are not delivering fuel efficiently, which can reduce performance, increase fuel consumption, and accelerate engine wear. Smoke during startup is often a sign of poor atomization caused by clogging.
- Check engine light or fault codes: For generators with electronic monitoring systems, a Check Engine Light or fault code may indicate injector or fuel system issues. These warnings should be addressed promptly to prevent further damage.
Tools and materials needed
Cleaning generator injectors effectively requires the right solutions and tools.
Common cleaning solutions include fuel injector cleaners for diesel engines, diesel-specific solvents for diesel generators, and manufacturer-approved additives. Fuel injector cleaners are convenient for routine maintenance and light buildup, diesel solvents work best for heavy carbon or varnish deposits, and approved additives help with periodic preventive care to keep injectors in optimal condition.
You will also need some basic tools: hand tools to remove injectors, specialized injector cleaning kits, compressed air for drying and flushing, clean containers to soak or catch fluid, and replacement seals or o-rings if the old ones are worn or damaged.
Having these ready ensures the cleaning process is smooth and efficient.
Preparation steps
Cleaning injectors requires patience and careful execution. Following the proper steps ensures thorough cleaning and reduces the risk of injector or engine damage.
#step1: Safety precautions when cleaning generator injectors
Working on a generator’s fuel system involves fire, chemical, and mechanical hazards. Following proper safety measures protects you during inspection and cleaning.
- Work in a well-ventilated area: Fuel vapors can build up quickly in small spaces, increasing fire risk and the chance of inhaling toxic chemicals. Adequate ventilation or an open-air environment reduces these risks and makes handling solvents safer.
- Avoid open flames and sparks: Fuel is highly flammable, and fumes can ignite from even small sparks. Keep cigarettes, heaters, welding tools, and electrical equipment away from the work area. Cleaning solvents can also react strongly to heat, so extra caution is needed.
- Wear protective gear: Gloves protect your skin from fuel and cleaning solvents, while safety glasses shield your eyes from debris and splashes. Proper protective equipment is essential when handling pressurized components, sharp tools, and chemical cleaners.
#step2: Preparing the generator for cleaning
Begin by shutting down the generator and allowing the engine to cool completely. Close the fuel valve to prevent fuel flow and disconnect the battery or power source to avoid accidental engine operation. Relieve any pressure in the fuel system to prevent fuel sprays. These precautions protect both you and the generator from burns, injury, or accidental starting. Once the area is safe, fuel lines and access covers can be handled without risk.
#step3: Removing the injector
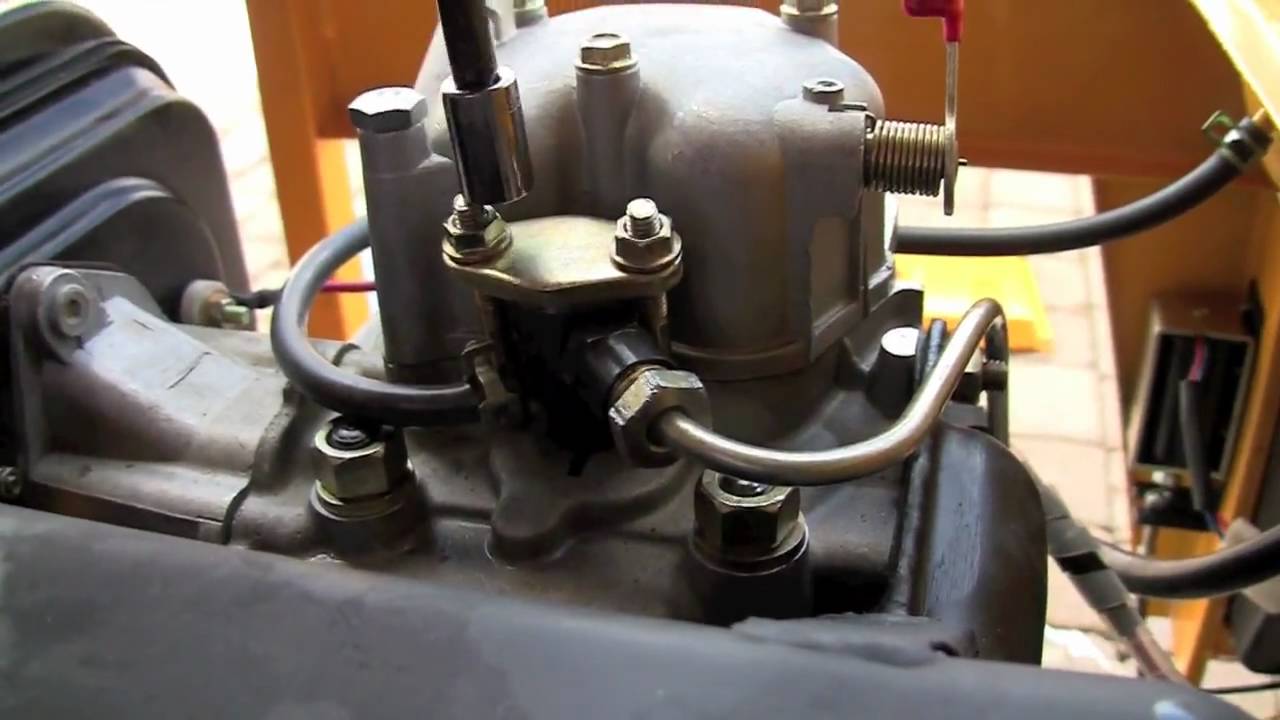
Injector removal varies by generator design. Some units provide direct access, while others require removing covers or intake components. Carefully unscrew fuel lines without bending or breaking them, then loosen the injector using the correct wrench or socket. Remove each injector gently, avoiding force that could damage sealing surfaces. Diesel injectors are often mounted directly on the cylinder head, while injectors may be integrated into a fuel rail. Enclosed generator designs may require panel removal, whereas open-frame designs offer easier access.
#step4: Inspecting for wear or damage
Before cleaning, inspect each injector for rust, cracked tips, bent nozzles, or excessive wear. Irregular or worn nozzle holes indicate that cleaning alone may not resolve performance issues, and replacement may be necessary. Inspecting injectors helps confirm whether cleaning will actually restore proper operation.
#step5: Documentation and labeling
Take photos of the injector layout and connections, label fuel lines and electrical connectors, and keep all parts organized in clean containers. This careful documentation prevents mistakes, saves time during reassembly, and avoids costly engine problems caused by misconnected or misplaced components.
#step6: Cleaning generator injectors
The method used to clean injectors depends on the severity of the buildup. Care must be taken to avoid scratching or damaging the nozzle tips, as even minor imperfections can disrupt the fuel spray pattern and reduce engine performance.
| Your situation | Recommended method |
|---|---|
| Routine maintenance / mild symptoms / NO disassembly required | Method 1: fuel additive treatment |
| Moderate buildup / planned service window / basic tools available | Method 2: diy manual cleaning |
| Heavy fouling / high-hour equipment / mission-critical standby unit | Method 3: professional ultrasonic cleaning |
Method 1: cleaning with fuel additives
Using fuel additives is an easy and effective way to maintain injectors and address mild buildup. This method is ideal for generators showing early signs of deposits, such as slight rough idling or minor power fluctuations, rather than severe clogs or mechanical damage. Fuel additives work by dissolving carbon, varnish, and other residues inside the injectors and fuel system while the generator is running, helping restore smooth fuel flow and efficient combustion.
The additive is poured directly into the fuel tank, mixes with the fuel, and travels through the injector system. As the generator runs, the cleaner loosens and dissolves deposits from the inside. Many additives also contain detergents that prevent new deposits from forming. While they cannot fix severe blockages, they are excellent for routine maintenance between manual cleanings.
Step-by-step procedure
- Choose a high-quality fuel injector cleaner compatible with your generator. Concentrated formulas are often more effective for noticeable buildup.
- Follow the manufacturer’s recommended dosage carefully; too little may be ineffective, too much can cause fuel system issues.
- Add the cleaner to the fuel tank before refueling to ensure it mixes evenly with fresh fuel.
- Run the generator under load for the period specified by the cleaner’s instructions, allowing the solution to circulate and dissolve deposits.
- Pros: Fast and simple, requires no disassembly, safe for routine use, and helps maintain injector performance over time.
- Cons: Less effective on heavily clogged or mechanically damaged injectors, may require repeated treatments for stubborn deposits.
Fuel additive cleaning is a convenient first step in injector maintenance and can help extend the life of your generator’s fuel system when used regularly.
Method 2: DIY manual cleaning (advanced users only)
This approach allows injector cleaning at home but requires strict safety precautions. Begin by disconnecting the battery and relieving fuel system pressure. Carefully remove the injectors, disconnecting the fuel rail and handling each injector gently to avoid damage or fuel spills.
Once removed, clean the injectors with a specialized solvent or carburetor cleaner. Apply the solution to the nozzle tip, removing visible deposits, and flush the injector to remove loosened debris. Avoid spraying electrical connectors or sensitive components. After cleaning, reinstall the injectors with new o-rings, ensuring proper seating and torque to prevent leaks. Manual cleaning provides direct access to the nozzle and internal passages, improving fuel atomization when done correctly.
Method 3: Professional ultrasonic cleaning (recommended)
Ultrasonic cleaning is the most thorough and reliable method for heavily clogged injectors. The injector is immersed in a cleaning solution while high-frequency sound waves generate microscopic bubbles that remove deposits from deep internal channels. This restores proper spray patterns and can include flow testing to ensure accurate fuel delivery.
- Complete removal of internal and external deposits
- Verification of spray pattern and fuel flow
- Replacement of worn seals and o-rings
- Long-term reliability and peace of mind
While DIY manual cleaning is effective for light to moderate buildup, ultrasonic cleaning provides the best results for older, high-hour, or heavily used injectors, restoring them close to factory performance.
#step7: Reassembly and testing
After cleaning your generator injectors, proper reinstallation is crucial for safety and optimal performance. Start by installing new o-rings or seals, lightly lubricating them if recommended by the manufacturer to ensure a tight fit and prevent leaks. Carefully place each injector in its correct position, reconnect all fuel lines and electrical connectors, and tighten fasteners to the manufacturer’s specified torque. Proper reassembly ensures the injector system functions correctly and maintains engine reliability.
Once reinstalled, test the injectors to verify the spray pattern. A proper pattern should resemble a fine, even mist. Irregular or uneven spraying indicates residual debris or internal blockages, requiring additional cleaning before full operation. Bench testing is ideal, as it allows fuel pressure control and easier detection of problems before mounting the injectors in the engine.
After bench verification, reconnect the battery and open the fuel valve. Run the generator at low load for a few minutes to circulate fuel and flush any remaining cleaning solvent. Prime the fuel system according to the generator’s guidelines, check for leaks, and perform the first startup while observing engine behavior, listening for unusual noises, and confirming smooth operation.
Finally, conduct performance verification under normal load. Monitor for stable power output, smooth engine operation, proper exhaust, and restored fuel efficiency. Ensure previous symptoms, such as rough idling or power loss, have been resolved. These steps confirm that the injector cleaning was successful and that your generator is ready for reliable, long-term operation.
Troubleshooting
Even after cleaning, some injector-related problems may persist. These issues can result from improperly seated injectors, damaged seals, residual deposits, or other fuel system components that were not addressed during cleaning.
In some cases, injector replacement becomes necessary. Signs include mechanical damage, worn or chipped nozzles, or persistent clogging that cannot be resolved with fuel additives or manual cleaning. Continuing to clean severely damaged injectors is unlikely to restore performance and may lead to engine damage.
To diagnose persistent issues:
- Check fuel quality to ensure it is clean and free of contaminants.
- Inspect electrical connections for corrosion or loose contacts.
- Monitor injector spray patterns, if possible, to verify proper atomization.
If problems continue, consult professional diagnostic services.
DIY injector cleaning vs. Professional service
DIY cleaning is cost-effective and allows hands-on control of routine maintenance. It is ideal for light clogs and preventive care.
Severely clogged or damaged injectors require advanced diagnostic tools and cleaning equipment. Professional workshops offer ultrasonic cleaning, pressure testing, and spray pattern analysis, restoring injectors to near-original performance.
DIY cleaning is inexpensive and can be completed quickly, but professional services, while more costly, provide long-term reliability and ensure injectors operate at peak efficiency. The choice depends on the severity of injector issues, the criticality of the generator, and acceptable downtime.
Precautions to keep injectors clean
Preventing injector clogging is easier than restoring heavily clogged nozzles. A few consistent habits can significantly extend injector life and improve generator performance.
Use clean, high-quality fuel: Fresh, high-quality fuel reduces contamination and prevents residue buildup. Fuel stored for long periods can develop moisture, sludge, and chemical breakdown products. Non-ethanol or properly stabilized fuel is ideal, especially for standby generators that run infrequently.
Change fuel filters regularly: Fuel filters keep dirt and debris out of the fuel system, protecting injectors. Clogged filters cannot perform effectively, so scheduled replacements ensure a steady supply of clean fuel.
Run the generator periodically: Running the generator monthly under load keeps fuel circulating, burns off moisture, lubricates components, and prevents buildup in the injectors.
Use injector cleaner additives occasionally: Regular use of injector cleaners helps dissolve early-stage deposits and prevent accumulation.
Practice proper storage: For long-term storage, add fuel stabilizers to keep fuel fresh and consider fuel polishing in larger or critical systems to remove sediment and contaminants.
Conclusion
Keeping your generator injectors clean is vital for reliable performance, fuel efficiency, and long-term engine health. Light buildup can be managed with fuel additives, while manual or professional ultrasonic cleaning is recommended for severe clogging or long-term neglect.
BISON supplies a full range of diesel and gasoline generators, replacement fuel injectors, and service parts to distributors and OEM customers worldwide. Our products carry CE and EPA certification, with MOQ flexibility to suit order volumes at every scale.
Have a generator fleet to maintain, or sourcing injectors for resale? Contact the BISON team for a parts catalog, pricing, and lead time — we typically respond within 24 hours.
Related Posts
Are Chinese generators any good?
Home / News / Table of Contents Generators are a critical power infrastructure investment for distributors, importers, and project buyers

How do I import a generator from China?
A step-by-step import guide written by BISON. Covers supplier vetting, certifications, shipping costs, customs clearance, and how to avoid the most costly mistakes.

air-cooled vs. liquid-cooled generators
Air-cooled vs. liquid-cooled generators: Discover which system provides better cooling, performance, and reliability for your home or business.
generator maintenance checklist
This guide outlines a complete generator maintenance checklist, showing what to check at regular intervals. Following this systematic checklist ensures your generator runs reliably